Data import templates determine how imported data is ingested into Unify and mapped to the appropriate record fields. When you add a data import template, you will use a sample file to establish the initial mapping to be used for subsequent data imports. Clicking on a template opens the template so you can manage template settings.
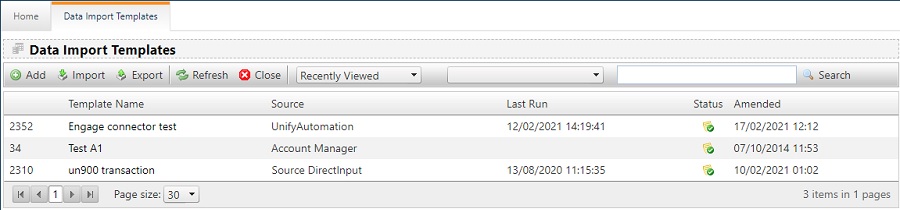
Adding a Data Import Template
These instructions are for building a new template. If you are exporting/importing a template, use the export and import functions.
Note: You must create a Data Source to use before you can configure a Data Import Template.
-
Under the Data Loading menu open Data Import Templates and click Add to start the process.
-
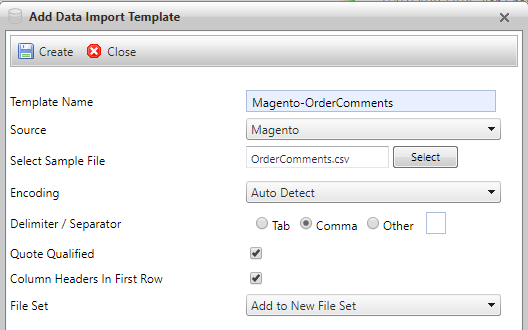
Give the template a name. This name is also used to create the folder which the data will be sent to. Note that this name may also be seen by suppliers when SFTP details are supplied and they are requested to push data into the appropriate folder (i.e., Customer Details and Bookings).
-
Be sure to select the correct Source. This is where the Source IDs will be stored and used for matching.
-
Specify the sample file that you will use for the initial mapping.
-
Specify a delimiter: comma, tab, or pipe. For pipe, click other, and type ‘|’.
-
For the File Set, select the template set that the template will become part of.
-
Select the other options as appropriate.
Best Practices for Sample Files
For best results, use a sample file to create the template that meets these criteria:
- No more than 1000 rows.
- Include varied data because these values will be used to help mapping.
- The file should always include headers.
- The last row of the file should be blank.
- File format should be txt or csv.
Managing Template settings
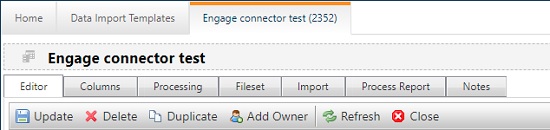
Once you have added a data import template, click on the template to open the template and access additional template configuration tabs.
-
The editor tab allows you to edit general configuration fields, add/edit template owners, or duplicate the template.
-
The columns tab allows you to manage your template's column attributes, add further columns, or reorder columns.
-
The processing tab allows you to define the deduplication rules that the template applies to input files.
-
The Fileset tab allows you to define the template set rules, manage the process order, and add a process schedule for the template.
-
The Import tab allows you to configure compression and encryption settings for the import process.